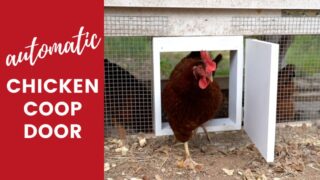
DIY Chicken Coop Run | How To Build
- Pet DIY Projects
- April Wilkerson
- Updated: February 26, 2023
Thinking about building your own DIY chicken coop run? Check out this DIY project where I added a run to the chicken coop that I built recently!
A few weeks ago that I built this chicken coop and in this tutorial I’ll be showing you how I made this run to go with it. Lets get into it.
I started off by flipping the wings out on my Wilker Do’s miter saw stand and cutting some 2x4x to length on my miter saw in order to build a wall.

You could, of course, build the wall on site but it will be much easier to build on the flat floor then transport them afterwards.
After cutting each of the studs to length I quickly marked off where each one needed to go, used a speed square to transfer the location to the top plate of the wall, then started attaching the studs with a framing nailer. I’m using a nailer because I have one but you could also go with a drill and screws.


After I built the first wall, I repeated the steps to make a second the same way. In order to have the rain run off, I made the front wall a few inches taller than the back wall. We don’t get snow in my part of Texas so my angle is really shallow but this can easily be changed by just making the studs of the wall taller in one wall.

With the walls put together I next paused to paint them. The entire run is wrapped in hardware cloth to keep chicken-eating-critters out. And take my word that it’s muuuuch easier to paint before any screening goes down. So I propped the walls up with some scraps and gave everything I could reach a good coating.

Keeping myself busy while those were drying, I started making the door to the run. I used up a lot of the off cuts from making the walls for this. Again, since I have a nailer that’s what I used to make it go quicker.

Then once the framing was done I also gave it a coat of paint.

Alright and now on to screening it.
I’m using 1/2” hardware cloth for this and it’s job is to keep anything that can eat chickens, away from the chickens. I would start off at one end of the wall and throw on a few Bessey clamps to hold the cloth securely while I unrolled the needed amount to stretch to the other side then start so a few more clamps could be placed and hold it down.

Next I could start stapling it down. I started on one end and worked my way towards the other while using my hand to work out any folds or extra material as I moved. I’ve done this job before with an electric stapler and while it did work, I was blown away at how much quicker and easier this pneumatic stapler made this job. So if you have one, I recommend pulling it out for this.

Once a panel was stapled down I would use a right angle grinder to cut off the excess. This one is overkill, but my small 3 inch grinder had a dead battery.

At this point all the work I could do inside the shop was done, so next I loaded the two walls and door on a trailer and moved to the chicken coop to start putting the walls in place.
To do that, I first started digging holes to place a few pavers for the walls to rest securely on. I started with getting the depth of the paver closest to the coop figured out first. After getting the depth about right, I also leveled it in both directions.


With that one set I just worked my way out, moving over to where about the center of the wall would land, and set another paver level with the first.


When I tried to put a level across the two stones, the dirt in between got in the way. To skirt around this issue I just place another block on top of each existing block to build up the height to place the level.

After getting the main depth of the stone right, I moved to a shorter level to make sure it was sitting level. I did this by picking it up and just tossing a few handfuls of dirt into the low side, until it had a perfect bubble.
Once I had three on one side complete, I moved to the other side and repeated with three more. Now making sure to read level not only off the first paver I set, but also the paver across from the one being set.

Oh, and a quick tip for you….my local store only had foot long pavers which were much longer than I needed. I wouldn’t care if I were having to dig a hole to accommodate it, so instead of using the full length I broke them in half…. caveman style 🙂


Pavers are set and level, time to move in the walls.

Remember that I have a short wall and a tall wall to create a slant in the roof, if you build this project make sure you note the wall you’re picking up and placing.

Once in place, I secured them to the chicken coop with my framing nailer.

Next was to make some rafters which will join the two walls together. I set up a quick work station right there on the job site with a mobile workbench and a battery operated miter saw, then started cutting some 2x4s to length.

For the roofing system I tried to keep it nice and simple so these rafters span between the two walls instead of sitting on top.

I would place a few Bessey clamps on the studs before setting the rafters and these acted as a third hand to hold up one end while I was predrilling and securing the other end with screws.

Note that if you don’t want to duck in the run you can easily adjust the height to however tail by simply making the studs in the walls taller.
After getting all the rafters attached I went back to my nailer and attached a few cross braces in between each rafter.

And now to deck it!
Depending on the type of roofing you go with for your run, you might not have to deck it. I’m using the same shingles that I used on the coop, which is much easier to install if the roof is decked. So next I threw up some plywood.

I cut the first sheet to land half way on a rafter, then cut a short section to cover the rest of the roof. Now to hop up and nail it down then move on to shingles.

I used some flexible flashing that also has a peal and stick underside, to span over the gap in between the deck roofline and the existing coop. This will prevent water from getting in between the two.

Then I started screwing down the shingles.

When roofing you always want to start at the lowest point and work towards the peak this way when water runs down hill it always stay on top of the material and not have a way under.


This particular shingle has corrugations in it which requires a screw to be placed into each one. The screw has a special washer on it to seat around the hole that is punch through the material to prevent water from getting in.

You can see when I lay a new shingle I’m using a tape to make the right of the shingle is the same distance off the previous row as the left. This is a simple way of keeping your rows straight. And that’s it for the roof. Little roof takes little time.
Back down to the ground to do some dirt work and prepare to install what’s called the predator apron.

Chicken killers will come knocking on the walls to get in and can’t, they will try and dig under the walls. To prevent them from being able to do that, wire meshing is also placed around the perimeter.
I wanted to frame in the underside of the coop to give the girls a little more room so a few more framing members were added in to give me something to attach this meshing to.

Then I placed the same hardware cloth I used on the walls, all the way around the coop and run.


Quick note on this: when I built my neighbors chicken coop I used hardware cloth for the run but wire meshing for the apron which does keep foxes, raccoons. And bobcats out, but not snakes. So lesson learned: use the smaller holed hardware cloth for both.
Ok don’t laugh. Ok, go ahead if you want to, it is pretty funny. .I screened myself out! I realized when I went to put in the door next that I screened over the panel it belongs. No problem though, I grabbed my small grinder (see this is a much more appropriate size for this job) and cut out the screening in the far right panel so I could pop the door in place.

When installing the door I of course use a few hinges and a handle, but I also placed two barrel bolts. Again, I was thinking about critters being able to get in. I placed one at the top as well as at the bottom of the door.


Alright and that’s it for the build portion of the run.
Next was to bring in some dirt and start covering up the predator apron and also grading a little bit. I used my tractor to bring in a buckle full then a hard rake to spread it all around. Making sure to get a nice coat on top of the apron to hide it.


Before calling it quits, lets make a few accessories that girls will need.
First a food dispenser. I grabbed about a 3’ section of 3” PVC pipe and a 90 degree elbow. I inserted another 3’ section into the elbow and figured out how long I wanted the feeder portion to be….maybe depending on how many chickens you have should determine this?

After cutting it to length, I used a hole saw bit to cut out a few holes along this length.

I used some sand paper to make the edges nice and smooth then threw an cap on the end to compete it.


I angled this holes slightly so the food inside wouldn’t want to spill out but will hopefully shield it from getting water into it.

The idea is this can be secured to the inside of the coop then chicken feed can be dropped in from the top to fill up the container, giving the chicks multiples access points to feed from.

If you have more chickens you can always make the PVC larger in diameter to hold more, or make the runs longer. You can also use another end cap at the top to cap it off. I cut a slit in mine and made it hinge open and closed for easier access.

Alright last thing was a watering system.
I kept this one just as easy as the feeder. I bought a 5 gallon bucket and lid, which I then drilled a few holes around the perimeter.

I bought these automatic chicken waterers where the chicken can use their beak to push again the yellow part which opens a valve and lets fresh water into the cup.

So a few holes along the bottom of the bucket, thread in the waterers, and cap it with a lid. I set this up on a paver stone then placed it inside the coop where it had access on all sides. To prevent from having to bring a hose inside the coop to refill it, I quickly drilled a hole in the lid of the bucket, then grabbed some more PVC, which I routed outside of the coop.
I made sure the elbow fitting on the end was large enough for a hose to fit inside of so that I can simply bring the hose over and top them off when needed.


Now I just need to put shavings inside the coop and introduce the girls to their new home!


My neighbor, who you might remember I built a massive coop for, actually hatched these baby girls for me which is why it’s been so long for me to get some.

I do intend for them to be free range but I wanted the run because new chickens need to be kept in the coop for about two weeks when first being introduced to it and I wanted them to have more leg room other than the coop itself.

Also, we occasionally get predators like bobcats and packs of coyotes in the area, so again this will give them more leg room should I ever need to stow them away while these predictors move about.

Interested in building your own? Check out these plans!

I hope you enjoyed this one! I’ll see you on whatever I’m building next.
If you haven’t already, don’t forget to sign up at the top of this page for my newsletters so you don’t miss new projects!