DIY Folding Adirondack Chair | 12 Easy Steps!
- Furniture DIY Projects, Outdoor DIY Projects
- April Wilkerson
- Updated: March 4, 2023
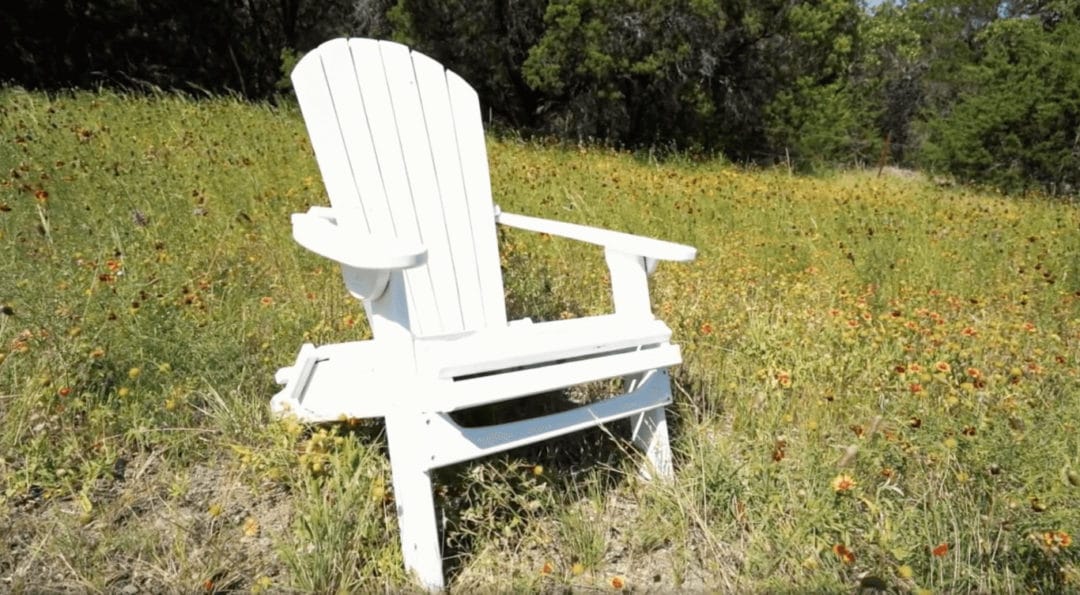
Looking to build your own DIY Folding Adirondack Chair? Why not make a Adirondack Chair that FOLDS to make it more portable and easier to store?
It is officially summer time and I’m needing some outdoor chairs. It’s crazy how expensive Adirondack Chairs are. So in this video, I am going to show you how you can make your own DIY Adirondack Chair with a special feature!

What I really love about this design is that it has a folding feature to make it low profile when stowing it away during the winter time.
I’ve created a set of folding DIY adirondack chair plans to make building this one (or multiples) quick and easy!
The first step to making a Folding Adirondack Chair is to grab our templates needed in order to build out the bottom of the chair. Place the templates over your 1x lumber and secure with standard scotch tape. The goal is to map out what is needed now so that all we have to do is assemble it later.

Head over to your Miter Saw to cut the longer boards into smaller sections. This helps to make cutting out the parts at the Band Saw more manageable. Here you can either do a rough cut at the Band Saw then use a Router with a flush trim bit to get the part perfect or you can take your time at the Band Saw to get the cut as close to the template trace lines as possible.

Use a Router Table to cut a quarter inch round over on all the exposed edges. If you do not have a Router Table, then a hand held router with a round over bit will work just as well! Remember to go slow and safe, let the tool do the work. Tip: If you are building with pine or another softwood you do not need your router speed turned all the way up – half speed will work just fine.

First, lay out the two main legs and attach the front seat slat. It’s helpful to have something to push up against so that once the slat is positioned in place you can drive it in with a screw while avoiding any shifting of the Adirondack chair legs. I recommend moving to attach the last slat on the seat after this to square up the structure.

Use a square to make sure that your legs are standing at a 90 degree angle in reference to a flat work bench or surface. Additionally, check to make sure the distance in between the back is the same as the distance in between the front of the legs.

Now, attach the remaining slats in between your front and back slats. You can use a spacer, but you can also eyeball the distance as well.

The seat is done! Next we will prop it up by attaching the Folding Adirondack Chair’s front legs. On the templates, I have marked where all the hardware needs to be placed. I would use an ald to transfer the hole location before using a quarter inch drill bit to push the holes through. This helps when it comes to lining up the bolt with the holes in the main legs. Repeat the process on the other side.

Use two clamps to attach the Adirondack Chairs front support right under the seat slats. This piece also serves as a grabbing point to allow you to easily carry the Folding Adirondack Chair when it is in it’s folded position.

Pull the templates needed to trace out all the back slats. Head over to your Band Saw to cut them out and round out the exposed edges. The templates have holes pre-marked where the two back arches need to be placed on the back slats. I found it easiest to lay the back arches down on a workbench and then lay the slats on top of them.

To make sure the slats are centered first find center on the arches and work your way out. I used a counter sink before driving each slat in with a screw to the top and bottom arches. Since this is a folding Adirondack chair the back won’t be attached to the seat right now. However, it will need to be set into place. Use some clamps to hold it into place while you move on to the next step: the arms!
This step consists of the Folding Adirondack Chair arm as well as a small vertical support. Set it into place on the chair. I recommend using a clamp to hold the front vertical support into place and up against the front leg to keep it from moving while you drill it into place. The hole locations are marked on the templates to make it easy to place. Once the hole is punched through, use a nut and bolt to secure the arm to the chair.
I recommend using a nylon locking nut for the hardware on this build. There is a nylon ring inside the nut that won’t allow it to slip back off over time.

Grab a level to get the arm perfectly flat. I also pre-drilled a hole and drilled in a screw. This part is fairly simple, but make sure the surface your Folding Adirondack Chair is on is level as well, otherwise you can accidentally end up with an off-level product.

To make this a Folding Adirondack Chair, place a small block that attaches to the back lower arch of the back assembly near the main leg. This is a small part! Make sure to pre-drill it so that it doesn’t spilt. Make sure the part is fully seated, but don’t over tighten. These blocks do need to pivot in order to give you the folding action.

You’re done! You can absolutely leave the wood raw, but you can also stain or paint the Folding Adirondack Chair to personalize them. The DIY Folding Adirondack Chair is an affordable and easy project. You can find all the materials you need at your local hardware store, and you can usually get them at a discounted price. Plus, you won’t have to pay for labor or shipping fees, so you can get a great deal on your new chair.
Easiest way to get started on your DIY Adirondack Chair is to grab my plans and watch the video above!
When it comes to painting or staining your Adirondack chair, there are a few things to keep in mind.
Making your own Adirondack chair is a great way to add a touch of style and personality to your outdoor space. Here are a few extra design ideas to get you started:
With a bit of creativity, you can make an Adirondack chair that’s truly unique and one-of-a-kind.
You should buy the templates and definitely check out the video for this DIY Adirondack Chair project for all of the details and the tutorial.
I also think a set of these chairs would make a great present for anyone on pretty much any occasion.

If you are interested in outdoor furniture, I also have templates for a porch swing and as well as templates for a rocking chair.
I hope you have a blast making your own outdoor furniture! I’ll see you on my next project.
If you haven’t already, don’t forget to sign up at the top of this page for my newsletter so you don’t miss new projects!
(Most of the links listed above are affiliate links. As an Amazon Associate I earn from qualifying purchases. Thank you for supporting me in this way.)
4 Responses
Really cool design, awesome chairs April! ????????????????????
Received my templates today, can’t wait to start building but I can’t seem to access the PDF plan file…
A material list would have helped a lot. But still looking forward to making a few of these
I just ordered these templates and the build plans are on the order page. I just clicked the link to download and it has the material list.
Comments are closed.