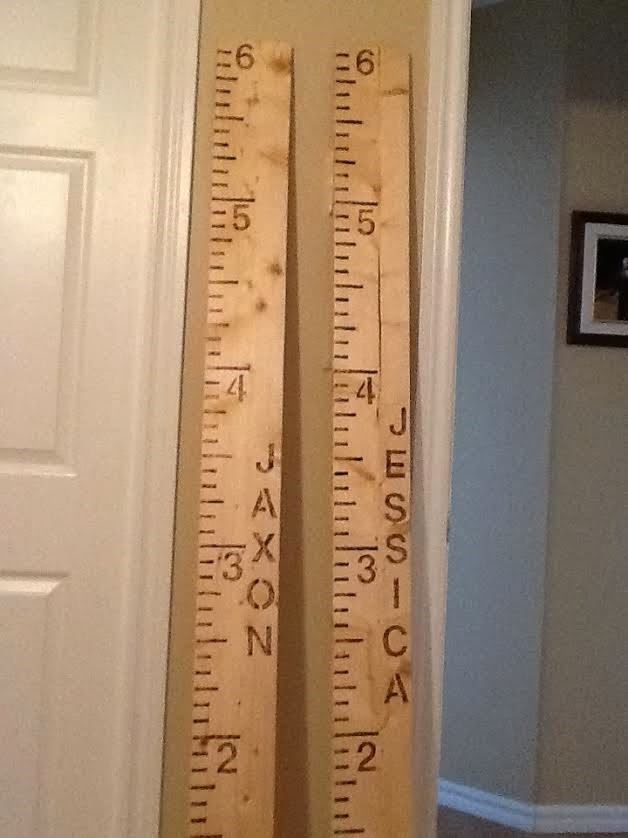
Thinking about making a DIY growth chart ruler? Check out this easy DIY project where I built a growth chart ruler for the wall!
A while back one of my girl friends sent me the below photo of an over sized ruler and told me it was a growth chart to keep track of children’s heights, and asked if I thought I could make her one.
I thought they were way too cool and not only did I make her one, instead of simply painting on the markings and numbers, I use a soldering iron and burn them in. Below are the steps for making your own!
**Update** Here is a video showing the process:
You will need:
- 1x8x8 piece of wood (I buy pine)
- Soldering iron (Hobby Lobby calls it a wood burner) or paint
- 3″ number stencils
- Tape measure
- Combination Square
A couple notes before I get started on the steps: I make my rulers go up to 6 1/2 feet tall and I start them at 6″, just like the photo above. Starting it off at 6″ means you will have to mount the ruler 6″ off the ground in order for it to be accurate; this gives clearance to the typical baseboard height in most homes. If you start your ruler off at zero then you will need to mount it so that it touches the floor.
Alright, lets get to those steps….
1) You can buy a 1x8x8 piece of pine at Home Depot for around $9.
2) The first thing I do is sand my piece of wood.
3) I lay out the tape measure and look at where the foot markers (the numbers) will line up. Since I burn mine in, I try to use the side where the numbers will not be positioned right over a knot because it makes burning in the number that much more difficult. Lay your tape measure out and if 1-6 fall on a knot, then take your tape measure and start from the other end and see if that side does any better for you.
Remember! to put 6″ at the end of your board and not the end of the tape measure. Use a clamp to clamp it in place so it doesn’t move around on you while you work.
4) Now I go through and mark every inch. My own personal system is: I find the inch mark then go 2/16″ to the right and 2/16″ to the left and place a mark in both locations. So my marks end up being 1/4″ wide, but doing it this way will make the center of your line true to the measurement.
Note: Only a small line is needed in this step. Just enough to mark it.
Now for the rulers I make, I like for the inch, quarter, half and foot lines to all be different sizes. You don’t have to do it this way, you could use any variation you like. The very first photo only uses two different sizes; one size for the inch mark, and one for the quarter and foot markings. So just look around and see what you like before getting started.
5) Using a combination square I go from the bottom and work my way up making the lines their needed length. Make sure the right flat portion of the combination square is kept up against the side of the wood so your lines are straight, and use the ruler to figure out where to stop on each mark. Below are the different measurements I use:
- Inch = 1″
- Quarter = 1 1/2″
- Half = 2″
- Foot = 3″
6) After all my lines are penciled in I go back through and make sure I didn’t make a mistake. I do this by placing my ruler (which is a foot long) on each foot section and double check that all the markings are in line with their respected number on the ruler.
7) Now to put the numbers on I find the first foot line and go 2″ from the edge and make a straight horizontal line. Then I go 1/2″ from that same foot line and make a vertical straight line. This gives me something to line my number up to. Not only to make sure it is straight, but also that all 6 look uniformed. Do this same step to all 6 foot lines.
Note: I am using 3″ number stencils.
8) Plug your soldering iron in and wait until it gets hot then you can start burning in the lines. My personal technique is to burn the outlines first because I like really straight lines but feel free to play around on a spare piece of wood to get a feel for what you prefer.
9) Next I go through and burn in the rest.
10) Then I burn in the numbers.
Note: If you don’t want to burn in your markings and would rather use paint, then you can use the steps to line out the ruler and numbers, but then use a paint pen or a small artist brush to paint in the lines.11) At this point, go through and erase the extra pencil marks you can still see then you can either leave it natural or put a coat on stain on it.
I have made over 100 of these guys, but don’t have one for my house yet (no kiddos) so I can’t show you what it looks like mounted, but here is a photo of a finished one.
Total Time: 2 hrs
Total Cost: $10 (if you only have to buy wood)
Note: Since I have everything to make these, it only cost me the price of the wood which is about $10. If you have to buy everything, this project will cost you around $50. Also, when I first started making these it took me around 4 hours from start to finish, so be patient! Edit: Since this is such a popular project I wanted to post a few more pictures of different variations for you to see.
Then here are two more that a reader emailed me after following my instructions. She rotated the numbers and also cut them off at 6′. : ) Don’t they look great?!
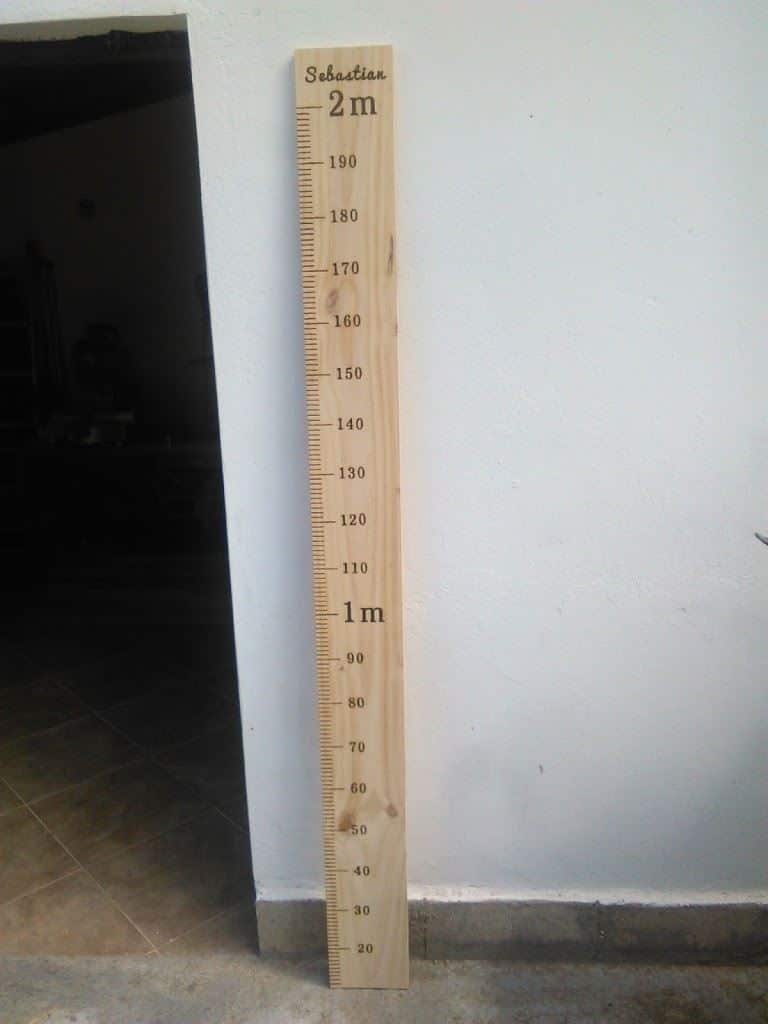
Then here is another one made from a reader, and this one is done as a metric growth chart ruler that also has the child’s named burned on the top.
It makes me so happy to know people are using my tutorial, so don’t be shy about emailing me a photo of your rulers if you made one!


