
Easy DIY Hanging Bed Porch Swing
- Outdoor DIY Projects
- April Wilkerson
- Updated: March 8, 2023
Thinking about building your own DIY hanging bed porch swing? Check out this DIY project where I built a hanging porch swing from a tree!
I have been dying to make a bed swing ever since the first time I saw one. It’s almost like a porch swing but a little larger so that you can stretch out a bit more. My mom jumped at the chance to have one since she lives in the country with plenty of trees to hang it from. Now, I have seen these with a crib mattress and a full size mattress but I used cushions purchased at a local home store. I’m 5’6″ and am able to stretch out fully if I want to, or sit in it and have plenty of room for my feet to be curled up. Here is a step by step on how I made mine and if you would like the templates to make your own, I have them available for purchase here!
The first thing I did was pick out my cushions. I do not recommend building a swing and then going to find cushions to fit it. It would be much easier to get the exact cushions or mattress then build your frame and deck to them. If you want to use the exact dimensions I used, AtHome (formerly Garden Ridge) has the same cushions in several different colors and patterns.
I started with making the footer which I wanted to be 5′ long. I didn’t want just a plain rectangle footer so I grabbed a scrap board and cut it to be 2 1/2′ long which is half of the length of my footer. Then I hand drew some curves until I liked the design and used my bandsaw to cut it out. This gives me a template for half of the footer so that I can place it on one side and trace it out, then flip it to the other side and trace again. This will leave me a perfectly systematical design. Note: If you don’t want to go through the hassle of this, there is nothing wrong with leaving it as a rectangle! Next I cut the bottom supports. First using my miter saw to cut lengths of 32″ then my table saw to rip them down to 2 1/2″. To give myself a way to attach them, I pulled out my pocket hole jig and put in two pocket holes on one end, and six along the side. Wilker Don’t: I put six pocket holes on all five pieces, however they are only needed on three supports. These three will be placed in the middle and the two supports without them will be the sides.
 To attach them to the footer, I laid the footer face down then first attached the two side supports. (mine have pocket holes, but yours shouldn’t) These side supports should be lined up flush to the top of the footer (which is the side of the footer without the decorative design).
 Then I attached the three middle supports to the footer. I placed one in the center then the other two on the right and left of it. These three are not flush to the end like the side supports. These need to be attached so that when the deck is attached, they will be flush against it. So I grabbed a 1×6 that I would be using for the deck and I clamped it in place so that I could place the supports exactly where they needed to be and screwed them down.
 Next I started attaching the 1x6s to make a deck. I first used my miter saw to cut the board to length at 58 1/2″. Then I drilled three pocket holes on each end of the board then set it in place and screwed it down. After attaching the ends of the board, I also went to the center support pocket holes and attached them.

 I repeated this process and added the rest of my 1x6s (five total).
 I didn’t want the deck to cover up all of the supports because I needed room to attached the back supports later, so instead of attaching another 1×6, I took the cut offs from two other boards and ripped them to 2″ then attached them. This leaves about 2 1/4″ of the supports exposed.
 With the deck built, I started making the back supports. I took a 1×4 to the miter saw and cut 7 lengths of 21″ then ripped them down to 1 1/2″ on the table saw.
I wanted to beef up the two side back supports because I knew I would later run a carriage bolt and chain through them, so I took two pieces that I just cut and glued them together. I did this twice so that I would have two beefed up back supports at 1 1/2″ and three 3/4″ supports. After I glued them together I stuck them in my vise with some clamps to dry.
 While that was drying I decided to start making the back. I cut two lengths at 5′ and ripped them down to 2 7/8″. These will make up the top and bottom rails of the back. Then to make the stiles, the vertical slats, I set up a stop block at the miter and cut 15 pieces at 13 1/4″ tall. I wanted these to be slightly narrower than the top and bottom rails so I ripped these to be 2 3/8″.
 I used my router with a round over bit to go over one side on the pieces. I also went over the front of the footer while I was at it.
 It was at this point I started looking at the side and decided I didn’t like it. So I drew a decorative design on another piece and used pocket holes to attach it. Of course, if you are building one you can make this side piece from one board instead of two.

 Once I had this in place, I no longer liked the way the side and the footer flowed into each another, so I grabbed a jigsaw and cut off some of the sharpness. : ) Again, if you are building one off this tutorial you can use my templates in order to cut this right at the very beginning.
 Before going forward I painted everything. The entire bottom assembly as well as the back supports and the rails and stiles. This is made from pine, which is not a very durable wood for outdoor use, so in order to make this last for a while you have to seal it really well to keep rain out of the wood. I put on three coats of exterior paint and made sure to not only get the top but also the bottom and all the ends.
 When everything was dry I started to figure out the back. I first set one of the arms in place and decided on what angle looked the best to me. Once I liked it, I used an angle finder to set the angle so that I could make the others match. My angle is roughly ____ degrees.
 I took the supports and drilled three pocket holes in each one. I then clamped it in place and drilled a 1/4″ hole through it and the bottom support it was clamped to. I used a hammer to tap in a carriage bolt then put on a flat washer and a nylon nut.
Note: Make sure you are putting in your pocket holes so that they are facing the correct direction. You want them to be so that you will be able to drive in a screw and attach this support to the back.
 Now I assembled the back. I grabbed each slat and made a pocket hole on each end then spaced them out evenly and attached them. Me personally….I actually didn’t measure these. I just laid them out and eye balled their placement. : )
 When all the stiles were attached, I moved around to the back and used the pocket holes in the back supports to attach it. Then I attached the other three back supports the same way I attached the two side ones. I first clamped it in place and drilled a 1/4″ hole, inserted a carriage bolt then flat washer and nylon nut. Once it was tighten down I used the pocket holes to attach the support to the back.

 Next I started on the arm assembly. I first cut out the arms on the bandsaw (use a jigsaw if you don’t have one). I cut out a notch on the back so that it would fit around the back, then cut out a cup holder. I also cut 8 slats to use as vertical supports on each side, these are 9 3/4″ tall, putting the arm height at 10″.
 After going over all the edges with a round over bit, I quickly gave everything a coat of paint then put it together. I started by putting a pocket hole on the bottom side of the arm, to give myself a way to attach it to the swing. I stood up the slats then set the arm in place and screwed it into the back support.
 Next I screwed down the vertical slats. I made sure to place the pocket hole of these slats over the seam of the 1x6s (that make up the deck) so that my screw here wouldn’t run into a screw under the swing.
 My bit was too long to use for the top pocket holes so I ended up having to use a right angle attachment. If you don’t have one, then I would screw in the top of the slats to the arm first, then set the arm in place and screw down the bottom ones.
 To add additional support to the arm (and to hide the chain I will be putting in later) I went ahead and made a vertical arm support that will face horizontally. I cut it out on the bandsaw then screwed in a few pocket holes.

After rounding over the edges and a quick coat of paint, I attached them to the swing.

 And that’s it for making the body! Now, to hang it….
I bought two 3/8″ eyebolts.

I drilled a 3/8″ hole in the front of the swing, first checking the back side to make sure I wasn’t going to hit another screw. Then I first put on a nylon nut then a fender washer and fed the eyebolt into the hole. On the backside I put another fender washer and nylon nut then tighten it down so that the eyebolt was vertical.


I used a 3/4″ paddle bit to drill a hole in the arm for the chain to pass through (6 1/2″ from the front of the arm). I purchased a big S hook to hook onto the eyebolt and also the chain.
 On the back end, I undid the carriage bolt and fed a link of the chain on. Then I drilled another hole using a paddle bit, 9″ from the back. I used a small S hooks to connect this piece of the chain to the front chain.

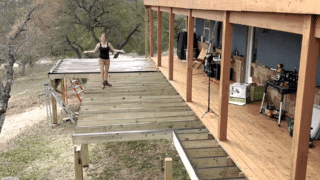
With the help of my husband and a friend, we hung it in a tree!

 I am so happy with the way this swing turned out! It’s very comfortable and makes for a wonderful place to just hangout and relax.
If you liked this project and want to stay up to date with what I’m building, then be sure to sign up for my email newsletter and you’ll get an email when I post something new. See you soon!
Total cost: $147


